The quickest way to understand Oracle APEX is to build something small that works end to end: a table, a page that lists its rows, and a form that adds and edits them. That one exercise touches the parts of APEX you use every day - SQL Workshop, the Create Application wizard, interactive reports, forms and Page Designer - and it takes about an hour.
This guide builds a simple training course tracker. Use any idea you like; the steps are the same.
Before you start
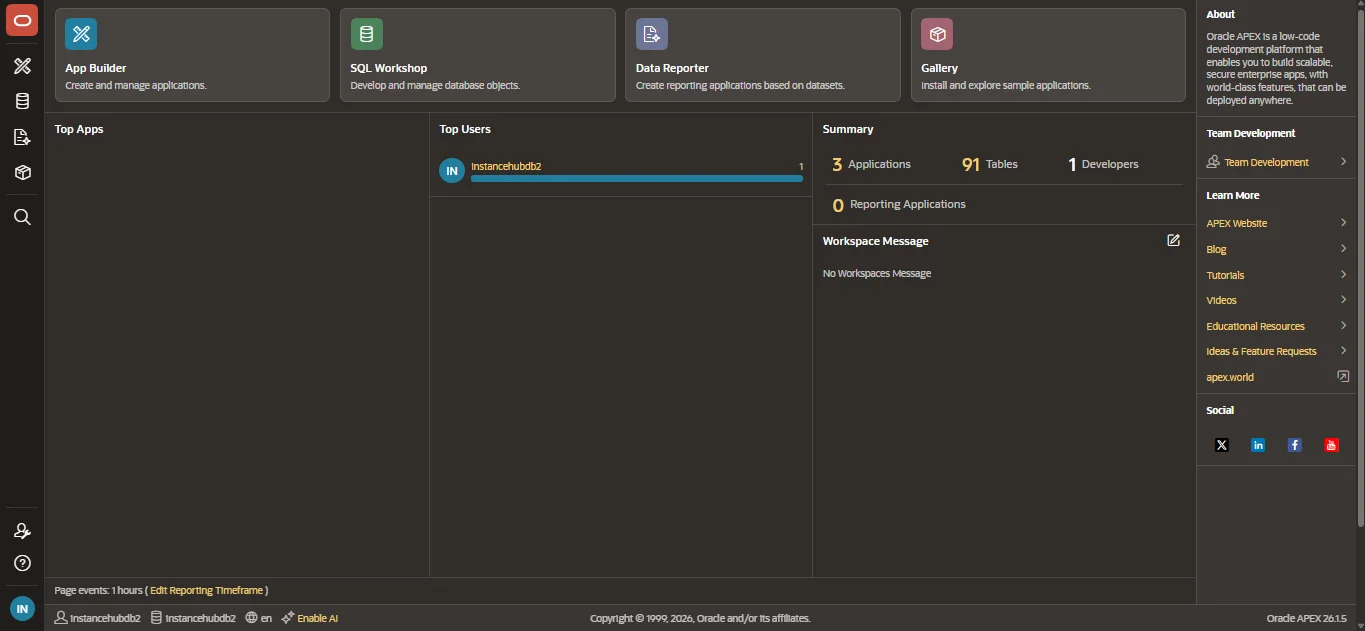
You need an APEX workspace and a login to it. On a practice instance, sign in to your workspace and you land on the workspace home with four main areas: App Builder, SQL Workshop, Data Reporter and Gallery.
Step 1: Create the table in SQL Workshop
Every APEX app sits on database tables, so start there.
- Open SQL Workshop > SQL Commands.
- Paste the statement below and click Run.
CREATE TABLE courses (
  id          NUMBER GENERATED BY DEFAULT ON NULL AS IDENTITY PRIMARY KEY,
  title       VARCHAR2(200) NOT NULL,
  product     VARCHAR2(50)  NOT NULL,
  level_name  VARCHAR2(20),
  start_date  DATE,
  seats       NUMBER(3),
  created_on  DATE DEFAULT SYSDATE
);
The id column fills itself, so neither you nor the form has to supply it.
- Add a few rows so the report has something to show. Wrapping them in one block lets SQL Commands run them together:
BEGIN
  INSERT INTO courses (title, product, level_name, start_date, seats)
  VALUES ('Fusion HCM basics', 'Oracle Fusion', 'Beginner', DATE '2026-11-02', 20);
  INSERT INTO courses (title, product, level_name, start_date, seats)
  VALUES ('OIC integrations', 'OIC', 'Intermediate', DATE '2026-11-09', 15);
  INSERT INTO courses (title, product, level_name, start_date, seats)
  VALUES ('APEX for beginners', 'Oracle APEX', 'Beginner', DATE '2026-11-16', 25);
  COMMIT;
END;
- Open SQL Workshop > Object Browser, find
COURSESand look at its Data tab to check the rows are there.
SQL Commands runs one statement or one
BEGIN ... END;block at a time. For longer scripts, SQL Workshop also has SQL Scripts, which runs a whole file.
Step 2: Create the application
- Go to App Builder and click Create, then choose a new application.
- Give it a name, for example
Course Tracker. - Under Pages, click Add Page and choose Interactive Report.
- Set the page name to
Courses, pick the tableCOURSES, and tick Include Form. This adds a second page, a form, linked to the report. - Leave the other settings as they are and click Create Application.
APEX builds the app in a few seconds: a home page, the Courses report, the form page, a navigation menu and a login page.
Step 3: Run it and try the report
Click Run Application and sign in with your workspace user.
Open Courses. The interactive report already does a lot without any code:
- Search across all columns with the search bar
- Actions menu: filter, sort, hide columns, add a highlight rule, create a chart from the data
- Download the rows, for example as CSV
- Save your filters and layout as a named report
Click the edit icon on a row to open the form, change the seats, and save. Then use Create to add a new course. You now have a working app that reads, adds and edits data.
Step 4: Improve it in Page Designer
The wizard gives you a starting point. Real APEX work happens in Page Designer, which opens when you click Edit Page on the developer toolbar at the bottom of the running app, or open the page from App Builder.
Page Designer has three panes: the page's components on the left, a layout in the middle, and the property editor on the right. Try these changes on the form page:
Make a field required. Select the Title item and set Value Required to On. Saving the form without a title now shows an error.
Turn Product into a select list. Select the Product item, change its Type to Select List, and under List of Values set the type to Static Values with the entries Oracle Fusion, OIC, Oracle APEX and Oracle EBS. Users now pick a value instead of typing one, so the data stays clean.
Use a date picker. If Start Date is a text field, change its type to Date Picker.
Add a validation. In the left pane, under Processing, right-click Validations and create one of type Expression. Item names start with P and the page number: with the steps above the home page is page 1, the report page 2 and the form page 3, so the seats item is usually P3_SEATS. Check the exact name in the left pane before you use it:
:P3_SEATS BETWEEN 1 AND 100
Give it an error message such as "Seats must be between 1 and 100".
Save, run the page again, and try to break your own rules.
On the report page, select a column such as LEVEL_NAME and change its Heading to Level. Small changes like this are what make a generated app look finished.
Step 5: Share a list of values across pages
If several pages need the same list of products, define it once:
- Open Shared Components > List of Values and create a new static list named
PRODUCTS. - Add the same four entries as before -
Oracle Fusion,OIC,Oracle APEXandOracle EBS- each with the same display and return value. - Go back to the
Productitem and set its List of Values to the sharedPRODUCTSlist.
If you skip step 2, the select list is empty and the form cannot be saved, because product is a required column.
Shared Components is where anything used by more than one page lives: lists of values, navigation menus, authorization schemes, application items and more.
Step 6: Export your work
When the app does what you want, export it from App Builder > Export / Import. The export is a single SQL file you can keep, version or import into another workspace. Keep the CREATE TABLE script with it, because the app export does not contain your table's data.
What to build next
Once this works, the same skeleton grows into most of what APEX is used for:
- Add a child table (for example course enrolments) and a master-detail page
- Add a dashboard page with a chart of seats by product
- Replace the static list with a SQL query list of values from another table
- Add an authorization scheme so only some users can edit
- Call a REST service and show its data in a report
All of this needs an APEX workspace with a database of your own underneath, where you can create tables freely. Our APEX plan includes the latest APEX, admin access and its own ATP database.
Questions people ask
Do I need to know PL/SQL to build an APEX app?
Not to start. The wizard, interactive reports and forms work with no code at all. SQL helps from day one, and PL/SQL becomes useful as soon as you add your own validations, processes and business rules.
What is the difference between an interactive report and an interactive grid?
An interactive report is for viewing and analysing rows: searching, filtering, charting and downloading, with edits done in a separate form. An interactive grid lets users edit rows directly in the grid, like a spreadsheet.
Where do I write SQL in APEX?
In SQL Workshop. SQL Commands runs individual statements, SQL Scripts runs whole files, and Object Browser shows your tables, their columns and their data.
Can I move my app to another workspace?
Yes. Export it from App Builder as a SQL file and import it into the other workspace. Create the tables there too, because the export holds the app, not your data.