Not every integration waits for a request. A lot of real OIC work runs on a clock: pick up a file every night, pull yesterday's new suppliers from Fusion at six in the morning, push changed records to another system every hour. In Oracle Integration Cloud these are scheduled integrations, and building one well is a standard interview topic.
This guide walks through a scheduled integration from creation to its first run, including the part people most often get wrong: making each run pick up only what changed since the last one.
App-driven or scheduled?
OIC integrations start in one of two ways.
- App-driven (event-driven) integrations start when something calls them: a REST request, a SOAP call, a business event from Fusion. They run whenever the caller decides.
- Scheduled integrations start on a schedule you define, with no caller at all. Older OIC versions called this style a Scheduled Orchestration.
If the question is "when X happens, do Y", that is app-driven. If it is "every night, find what changed and send it", that is scheduled. A good test in interviews: a scheduled integration has nobody to send a response back to, so everything it needs to know must come from the schedule, its parameters, or the systems it reads.
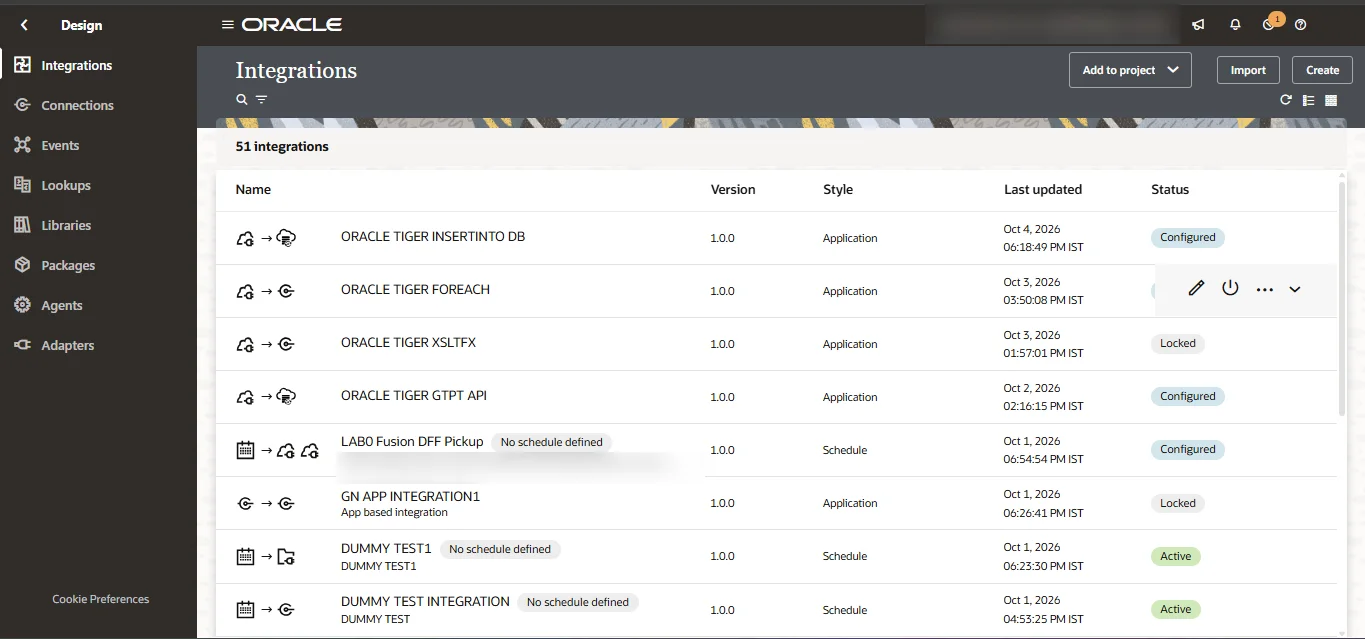
Step 1: Create the integration
From the OIC home page, go to Design > Integrations and click Create. Give it a clear name, for example "Daily new suppliers to file". When you choose how it starts, pick the Schedule option rather than an application trigger.
The canvas opens with a schedule node at the top instead of a trigger connection. Everything after it is built the same way as any other integration: invoke connections, map data, loop, write files.
Step 2: Add a schedule parameter
This is the step that turns a demo into something usable.
A nightly job that reads "all suppliers" every night sends the same records again and again. What you want is "all suppliers created or changed since the last successful run". OIC gives you schedule parameters for this.
- Open the schedule node and choose to edit it.
- Add a parameter, for example
lastRunTime, and give it a sensible default value, such as a timestamp from a few days ago. - Use the parameter in the query or filter of your first invoke, so the source system returns only records changed after
lastRunTime. - Near the end of the flow, after the data has been processed successfully, add an Assign that sets
lastRunTimeto the time this run started.
OIC keeps the new value of a schedule parameter for the next run. So each run starts where the previous successful one finished, and a run that fails before the Assign leaves the old value in place, which means the next run picks up the same records again rather than skipping them.
Two details to get right:
- Store the start time, not the end time. Records created while the run was working would otherwise fall into a gap and never be picked up.
- Make the target safe to receive a record twice. If a run fails after sending half its data, the next run sends those records again. An upsert, or a check for "already processed", keeps that harmless. Our guide to error handling in OIC covers this pattern in more detail.
Step 3: Build and activate
Build the rest of the flow, then save and activate the integration. While you are practising, turning on tracing with the payload is helpful, because you can see exactly what each step received and sent. Remember that payload tracing stores data, so use it for development rather than leaving it on everywhere.
An activated scheduled integration does nothing on its own yet. It runs only when you schedule it or start it by hand.
Step 4: Define the schedule
From the integrations list, open the Actions menu on your integration and choose Schedule. You then define when it runs.
- Simple schedules cover most needs: run once, or repeat every so many hours, days, weeks or months, with a start time.
- iCal expressions cover the rest, using the iCalendar recurrence format. For example,
FREQ=WEEKLY;BYDAY=MO,TU,WE,TH,FR;BYHOUR=6;BYMINUTE=0;runs at six in the morning on weekdays.
Check the time zone the schedule uses before you save it. "Six in the morning" in the wrong time zone is a classic way to send a file at the wrong hour.
Once saved, start the schedule. The integration then runs at each scheduled time until you stop it.
Step 5: Run it now, and check the run
You rarely want to wait until tomorrow morning to find out whether it works. From the same Actions menu, Submit now runs the integration immediately, and you can choose to run it with different parameter values, for example an older lastRunTime to reprocess a few days of data.
Each run appears in the monitoring pages of your OIC instance, with its status and, if tracing is on, the payload at each step. After the first successful run, check two things:
- The records arrived in the target, and only the ones you expected.
- The schedule parameter now holds the new value, so the next run starts from there.
Changing a scheduled integration later
An active integration cannot be edited. To change the flow, stop its schedule, deactivate it, make your changes, then activate and schedule it again. To change only the timing, edit the schedule from the Actions menu.
Plan changes for a quiet moment, because while the schedule is stopped nothing runs, and the next run after you restart it picks up everything since the stored lastRunTime.
Common mistakes
- No parameter at all, so every run sends everything.
- Updating the parameter at the start of the flow instead of after the data has been processed, so a failed run skips records.
- Storing the end time of the run instead of the start time, leaving a gap.
- Forgetting the time zone of the schedule.
- Testing only with the schedule. Submit now with parameters is quicker, and lets you replay a specific window.
Practise it
A good exercise on a practice instance: build a scheduled integration that reads records changed since lastRunTime from a REST or database source, writes them to a file or another target, and updates the parameter at the end. Run it with Submit now, add a record in the source, run it again and confirm only the new record comes through. Then break it on purpose, for example by pointing at a folder that does not exist, and check that the next good run picks up the missed records.
All of this needs an OIC instance where you can create integrations, activate them and schedule them. If you want that environment, our OIC plans list what each one includes.
Questions people ask
What is the difference between a scheduled and an app-driven integration in OIC?
An app-driven integration starts when something calls it, such as a REST request or a business event. A scheduled integration starts on a schedule you define, with no caller, and gets what it needs from its schedule parameters and the systems it reads.
What are schedule parameters used for?
Mostly for incremental processing. A parameter such as `lastRunTime` holds the time of the last successful run, the integration reads only records changed after it, and an Assign at the end updates it. OIC keeps the new value for the next run.
Can I run a scheduled integration without waiting for the schedule?
Yes. Use Submit now from the integration's Actions menu. You can also run it with different parameter values, which is useful for reprocessing a specific period.
Why can I not edit my scheduled integration?
Active integrations cannot be edited. Stop the schedule, deactivate the integration, make the change, then activate and schedule it again.